Visit No.1: Wednesday 12th March 2014
We journeyed down through Cornwall from Vegan Chat Room HQ on a trip to
Wildebeest, Falmouth's first vegan cafe/bar. The cafe had opened it's doors for the first time on Monday 10th March, and we were keen to sample their food. We found it quite easily, on Arwenack Street, one of the main streets through Falmouth.
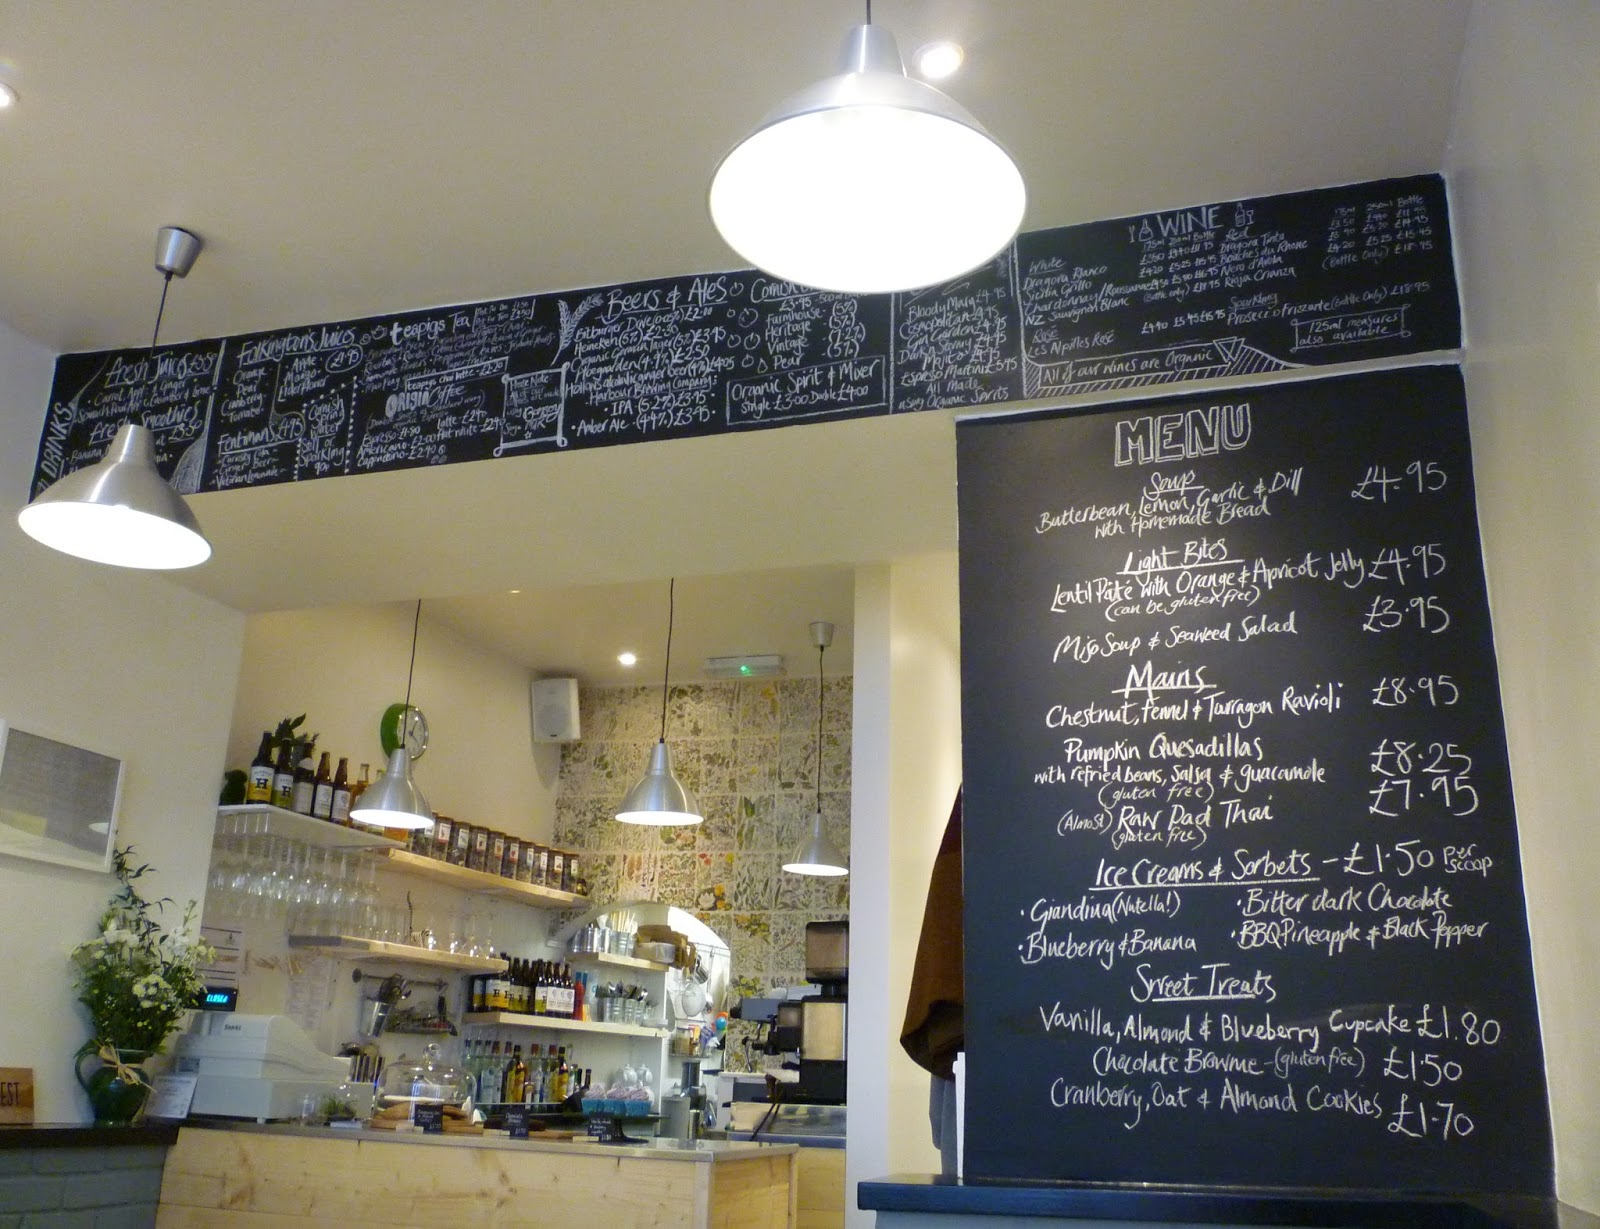
We had been trawling the charity shops of Falmouth, so were keener than ever to get stuck into some vegan grub. The cafe is very smart and clean, with pine benches and tables, together with a few green stools and food bar. I checked out the toilets, one for each sex which is great and very clean. I think there were around seven tables, so a fair size cafe really. There is also a chalk board for anyone feeling artistic, who wants to sketch down their vegan thoughts. On the shelves are mini cacti/succulent worlds.
We selected two main meals from the selection on the chalk board - Chestnut, Fennel and Tarragon Ravioli and Pumpkin Quesadillas with Refried Beans, Salsa and Guacamole (gluten free). We waited with drooling mouths for our food to arrive.
Very soon, our food arrived from the friendly staff, together with our cutlery which was contained in cleaned, reused and polished up tin cans, with recycled napkins.
Now, I have forgotten the times that I have sat wn in a veggie or vegan cafe or restaurant, awaiting the arrival of my food, keen to tuck into the selection of vegan fayre that I had selected from the menu, only to be disappointed to various degrees. I can honestly say, that this was the very first time that I have not been disappointed to even one percent of a degree. We shared both main meals, and tried the ravioli first. Rose told me later that they make and dehydrate their own cashew cheese and that was sprinkled on top of the ravioli. It was a dish comprising of a few ingredients, but those ingredients worked so well together. The fennel was a wonderful, mild aniseed flavour, it went so well with the tarragon and chestnut. The ravioli pasta was cooked really well, really light and with the cashew cheese on top melted in the mouth. Then, we were onto the Pumpkin Quesadillas dish. All four parts of the dish were very tasty independently as well as complementing each other. The pumpkin Quesadillas were a new one for me, they were also nice and light filled with a great flavourful pumpkin centre. We had all too soon reached the end of our meals.

Rose recommended two of the ice creams and sorbets for us to try, Giandina ice cream made with hazelnuts and BBQ pineapple and black pepper sorbet. We thought we would try a giant cranberry, oat and almond cookie each to go with it.
The Giandina was really rich and sooo, hazel-nutty, just like a cruelty free version of Nutella in an ice cream. The sorbet was really fresh and with such a wonderful pineapple hit. The fruity/nutty cookies were wonderful and went really well with the scoops, I did wonder how they fitted them in their oven though.
After we paid, we were given a loyalty card, which gives you one free drink after you have five stamps and a generous offer of 2 meals for 1 after you have ten stamps on your card.
Rose told us, that they having regular vegan sushi nights and they plan to have monthly events. My only complaint, is that Vegan Chat Room HQ is too far away from Falmouth and more importantly from
Wildebeest.
Visit No.2: Wednesday 18th June 2014
We decided to test out our new tent and go on a camping holiday further down into Cornwall near the Lizard. We planned our return journey to take in a visit to Falmouth and
Wildebeest. We arrived in the late morning, before the lunchtime kitchen had opened, so we had a little walk around Falmouth harbour in the sunshine.
From the menu this time we chose Gnocchi and Mex Mix, with a slice of Raspberry Cheesecake each for dessert.
The Gnocchi dish came with asparagus, capers, sage sauce, cashew parmesan, roast tomatoes and rocket.
The Mex Mix came with salsa, guacamole, refried beans, sticky onions, cashew cheese and home made tortillas.
Both meals were up to the high standards already set during our first visit, full of flavour and mouth-watering. This left just enough space in our bellies for dessert...
The Raspberry Cheesecake was, again, delicious. It all worked well together and was a treat for our taste-buds.
We remembered to take our loyalty card with us, so we've collected another stamp for our collection... and we'll back for more :)